


Hello everybody, I am Merrill Kazanjian (aka kazanjianm on YouTube). I will be your instructor.
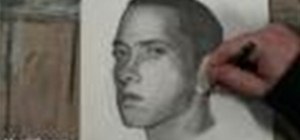
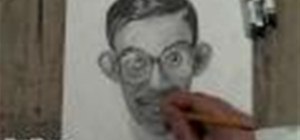
Before starting your figure drawing session. Please watch this short, funny video first to learn the basics of human proportion. The rules that you learn in this video will be very helpful once we start figure drawing (The second video).
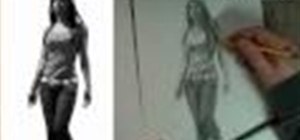
Now, you are ready to do some figure drawing. Please watch the video below and follow the instructions.
You Will Need The Following Supplies
- Drawing Paper
- Drawing Pencils (HB, 2B, 4B, 6B)....If you do not have drawing pencils, just use a #2 pencil)
- Blending Tool: A tortillion (blending stump), A bristle paintbrush OR a Q-Tip
Link to download reference image- http://merrillk.com/?part=fineart&articles_id=13881&act=artist1&a...
Today we are going to do an activity called interactive figure drawing. I made this video for my viewers who feel that they have graduated from my step by step videos and need another challenge. Before you watch the
Notes to remember for starting your drawing: Your first job is to see two shapes. The figure and the background. I want you to lightly scribble in the general shape of the figure. Start to notice the relationship between the head and the hips. The head is almost directly over her left leg and her hip is sticking out to the right. Notice the width of the arms compared to the torso. Notice where the finger tips end. It might be helpful to know that when our arms are fully extended to the side like when we give somebody a hug, the measurement from fingertip to fingertip is very close to our height. Be sure to notice the shape made by the negative space under her left arm.
Notes to remember as you develop your drawing: Once you get the general shape of the figure sketched in, you can start breaking the figure down in to smaller shapes. Notice that I am not just outlining the mass that I am creating, I am editing it. I am carving out the placement of the shapes just like I would for one of my step by step videos. The shirt was an easy place to start because it is central to this drawing. I followed it with the belt and the pants. I am developing the shading a little earlier than I would with my step by step videos. The shading actually helps me with future placements. A shadow forms a shape and I use these shadow shapes to help me place highlights and other shadows. When you are developing the left arm be sure to notice the shape that is formed in between.
Notes to remember to finish your drawing: At this point. It is all about edges. Great artists make their original lines invisible. I have not managed that level of skill yet but I am getting better at it because im aware of the importance of edges.
Just updated your iPhone? You'll find new emoji, enhanced security, podcast transcripts, Apple Cash virtual numbers, and other useful features. There are even new additions hidden within Safari. Find out what's new and changed on your iPhone with the iOS 17.4 update.


Be the First to Comment
Share Your Thoughts